Overview
I recently purchased a WHID injector, if you want one you can buy one here or here. If you’re not familiar with the device then I would suggest checking out this talk by the creator, Luca Bongiorni at Hack in Paris 2018. The WHID injector is as Luca describes it “a bash bunny on steroids” and looking over the specs it seems he is spot on:
- Wifi (Client and AP mode)
- Multi Platform
- 4 Mb flash
- Changeable VID/PID
- Open Source
- TCP/IP stack
- DNS Support
- Arduino friendly
- Pinouts on the PCB
- Hall Sensor inbuilt to easily unbrick (magnetic sensor)
- Approx 30Mb of storage space
The device looks like this:
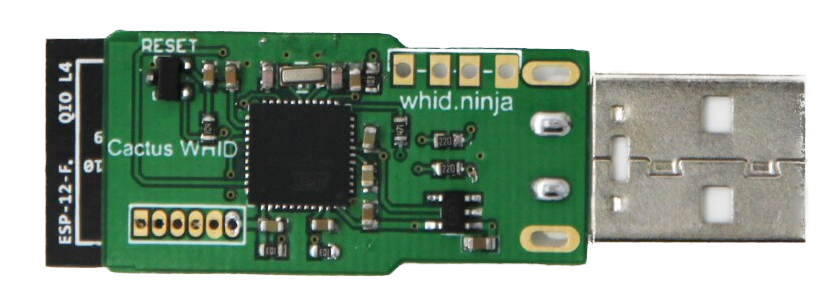
Pretty innocuous right? Now all that’s required to pwn a target is to plug it in, connect to the AP over WiFi and run our payload of choice. But what about if you are out on a pen test and there is no available workstation? I mean generally speaking it’s not usually possible to just lean over the receptionists desk and plug in a USB. This is where HID implants come into play.
Methodology
In this section I will walk through the steps required to easily and cheaply get a HID implant up and running. It’s pretty basic stuff so even if you have never touched a soldering iron or a multimeter before, with a bit of luck you should be able to manage it without burning or electrocuting yourself.
Prep
You are going to need a few tools to get the job done:
- Soldering Iron (any really but get something with a small tip)
- Solder (dont suck on it, lead is bad)
- Multimeter (optional but good to check for continuity)
- Flux (a cleaning agent that removes oxidation from metal prior to soldering)
- USB A -> USB A cable
- Snippers/Clippers
- Wire stripper (optional but better than using your teeth)
- Shrink Wrap (Some for the cable and some for the WHID Injector)
- Heat Gun / Blowdryer (if you’re bald and don’t own a blow dryer or heat gun you can use the barrel of the soldering iron)
- Phillips Head Screwdriver
Selecting a device
For the device that is going to contain the WHID Injector we have a few general requirements to meet:
- Someone should want / have a reason to plug it at work. (Nothing naughty)
- A device with a simple circuit
- Cheap, there’s a chance we won’t be getting it back
- Enough space to hide the WHID Injector
- 5V running over usb A (C is possible too but slightly more complex)
Scouting around I found a small 5v Desktop Fan that met all of the above requirements. You can buy the same one for $9.95 here.

Breaking it down
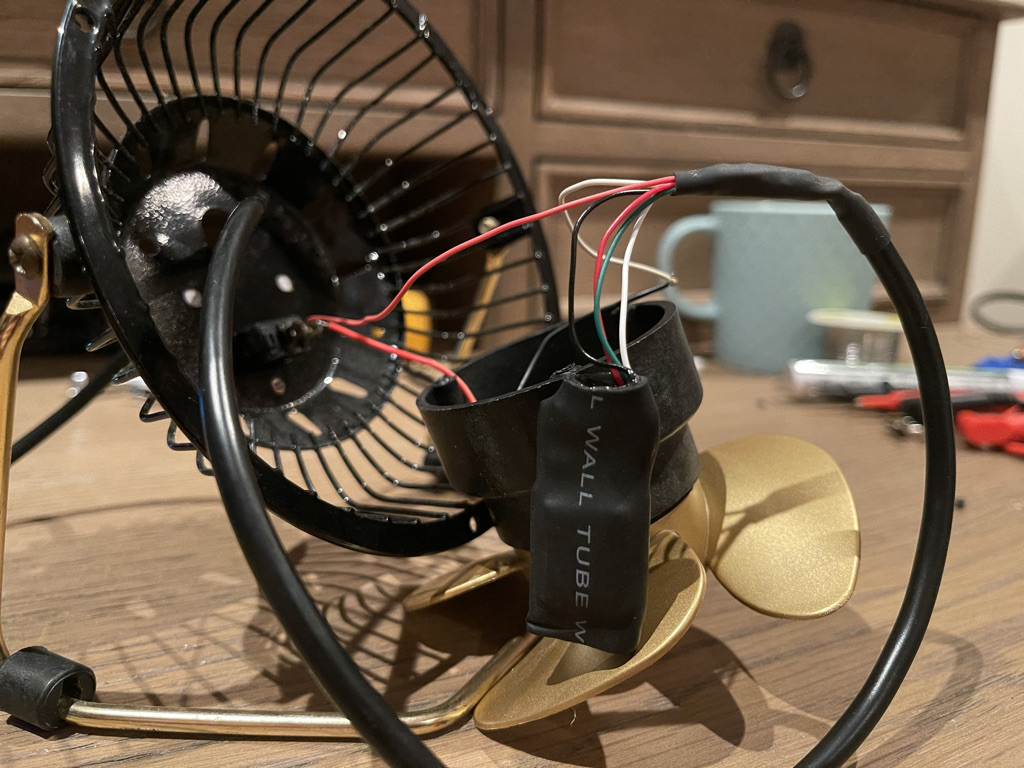
Opening the fan up presents a nice simple circuit with plenty of room for the implant:
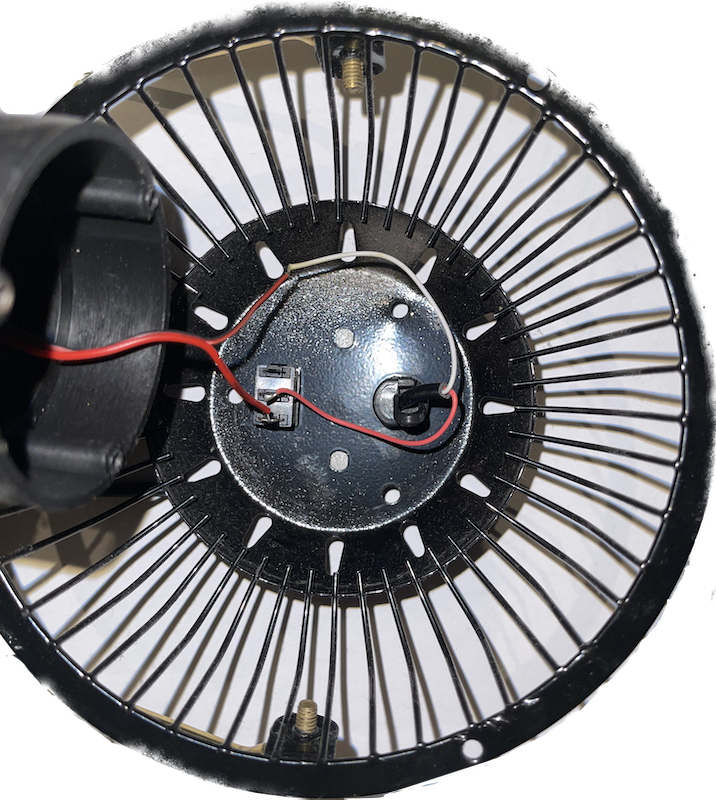
Looking at the internals the circuit is as simple as it comes with only 2 wires, 5V (RED WIRE) and GROUND (BLACK/WHITE WIRE). The 5V wire runs to a post on the switch, the other post on the switch runs to the Fans motor. The GROUND wire runs directly to the motor. When the switch is in the disconnected state the circuit is broken and when it is connected the circuit is live:
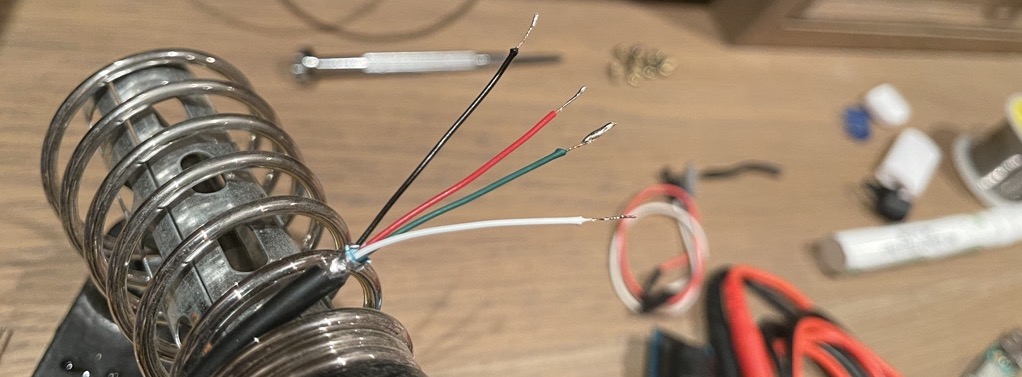
Now we are going to have to transfer data to and from our target host and for this to occur we are going to need a new cable with 2 more wires, DATA POSITIVE and DATA NEGATIVE. For background on what these wires do check this post here. Any USB A <-> USB A cable should do and when you cut one end off and strip it back it should look like this:
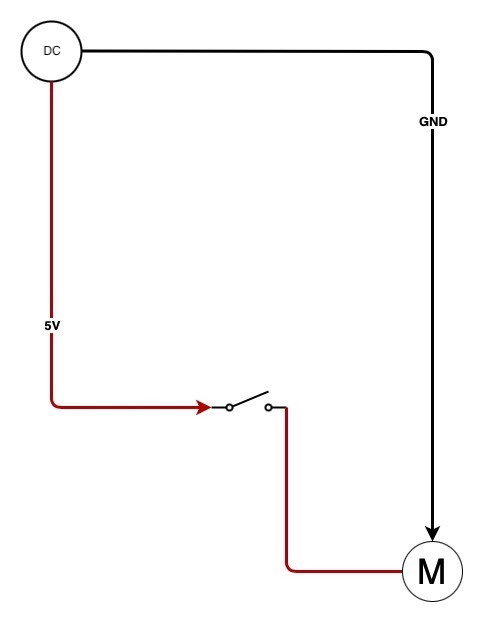
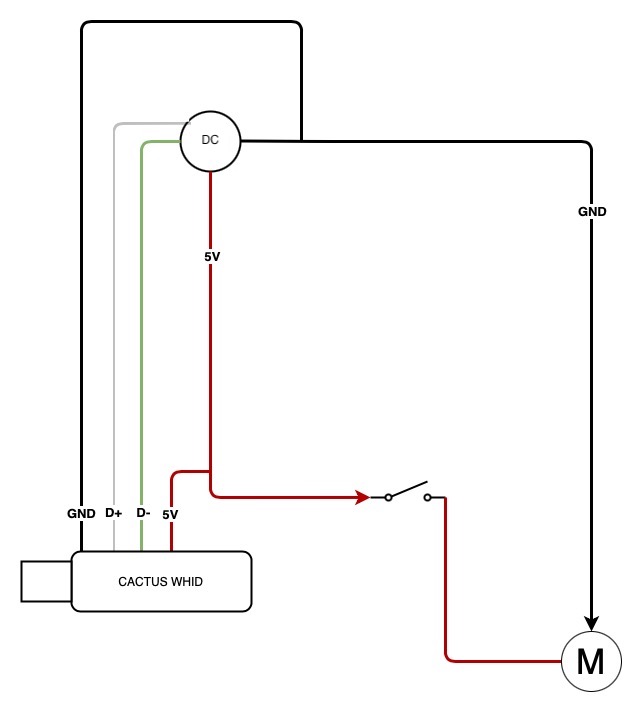
Snip the old cable off, pull it out, feed the new cable through the back of the fan and solder everything up according to this circuit diagram:
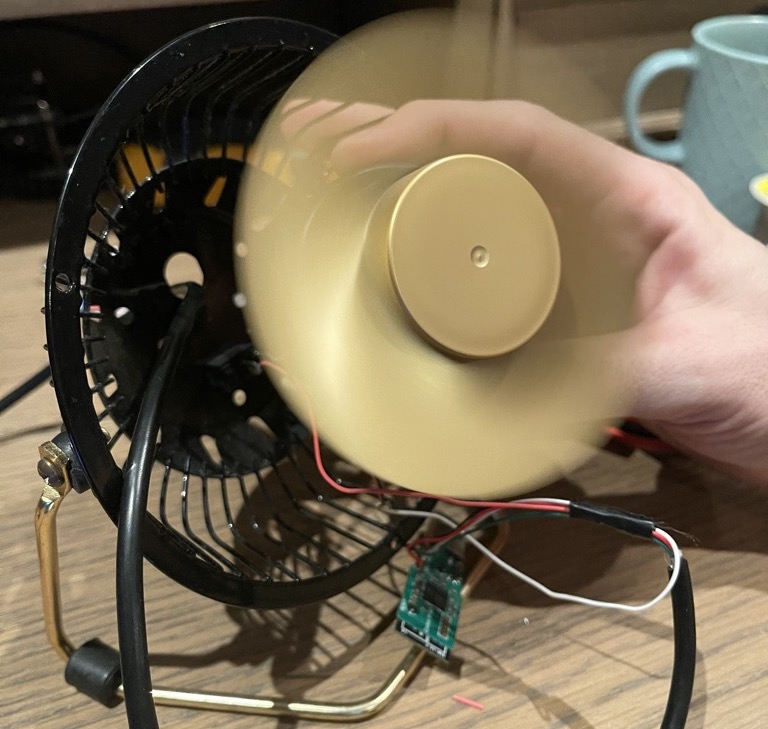
Now clean everything up, individually wrap the soldered sections on the wire with electrical tape, hot glue the solder points on the WHID injector to add a bit of strength to the connections and shrink wrap. I also snipped off the usb connecter with some clippers but you should probably desolder it instead if you have the time:

Now you can test everthing out and make sure it works! If you followed the circuit diagram correctly then the WHID Injector will be up and running whenever the fan is plugged in regardless of wether it is switched on or not.
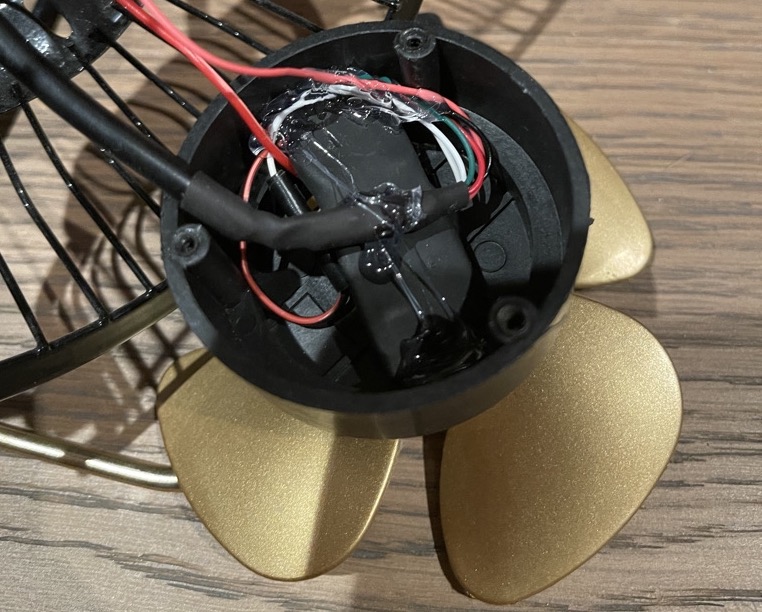
All that remains is to pack the WHID Injector inside the empty area within the plastic motor housing, hot glue everything in place and re-assemble:

Proof of Concept:
Now you could either leave this laying around your targets work area if it’s an internal pen test or if external you can package it back up with an invoice and send it to the business address :) Happy Hunting!